
I’ve seen a few people doing sous vide cooking at home for awhile now, on some cooking forums that I follow. I’m not sure of the full potential, but I’m intrigued. With a little Christmas cash to spend, I decided to buy a portable sous vide cooker that I believe was a good buy. After a little research, I settled on a model made by Gourmia that seems to get good reviews. The model number is GSV-140. Amazon was selling it for $99.00…retail is supposedly $199.00, which I probably would not have been willing to pay. A Foodsaver vacuum sealer is handy to have as well, though you could get away with using zippered storage bags…they just would be a little more likely to leak, and the vacuum makes the sous vide process more effective, I think. I’ve had a vacuum sealer for 20+ years. Disclaimer: I am not in any way sponsored by or reimbursed by either Gourmia, Foodsaver, or Amazon.
Okay. So, the sous vide cooker arrived and I unpacked it, and read through the quick start-up guide and some other literature that came with it. I’m not going to cover the definition of sous vide, or all the technical stuff here. You can find tons of information online. This is just to document my experiments and share them, if anyone is interested.
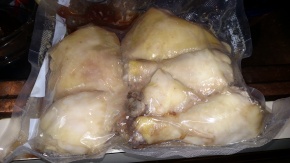
I had a vacuum sealed bag of chicken drumsticks and thighs on hand and decided to make that my first foray into sous vide.

Vacuum sealed chicken pieces.
It was pretty simple: follow the directions for clamping the cooker to a container (I’m using a stock pot), add water between two marks, using the bagged chicken to get the amount right with volume displacement. Remove the bag. Enter the time and temperature according to the instructions for the cut of chicken I used, and start. When the water is up to temperature, I added the bag back in, and clipped it to the side of the pot.

Dial in the time and temperature.
You will find that sous vide recipes often give a wide range of time for cooking. Without getting bogged down in the technicalities, what you are doing is a long, slow poaching; at a very accurate temperature. You cook for a minimum period of time required, to reach the target temperature throughout the product being cooked. At that minimum time, the food is safe to eat, but you can go to the maximum time in the recipe, without seriously affecting texture and quality of the product. Passed that time, some foods could get overcooked…mushy.
I set the temperature according to directions, at 158F. I cooked it for three hours. I could have stopped at two or gone for five, but I decided to do three hours. It was a bit unsettling that the juices in the bag were not “running clear”, like other cooking methods use as a gauge for chicken being “done”. They were still a murky, dark reddish color.

Chicken, unbagged.
Cooked chicken
However, when I opened the bag and pulled a piece of meat apart, it was cooked through. It was very moist and had a good texture. At this point, I could have finished on a grill or in a saute pan, if I wanted to brown the meat. I decided to just eat one of the thigh pieces and put the rest into the refrigerator for a later recipe.

Checking to see if cooked through.
Day two, I have done some reading on sous vide cooking eggs. I’m doing four eggs currently at 147F for an hour and a half.

The result should be like an over medium egg, or a medium boiled egg. I like a set white…no slime, and a yolk that has begun to gel, but not solid. If I were cooking in a pan, the result should be a yolk that is starting to solidify on the outside and still runny in the middle…so that, when I cut it up, there is enough runny yolk to coat the cut white pieces…but not runny enough to pool on the plate. I get pretty specific about how I like my eggs…I know! Will update later today.
Egg update: Holy mackeral. The egg yolks are perfect. The texture is creamy and amazing! The whites were a little underdone for my liking, but from my reading, I know that some may remain watery…and I was able to dribble that little bit off. So, now I just need to experiment with adjusting the temperature up a couple of degrees and/or try adding another half hour to the time. It was fairly easy to get the eggs out of the shells. I just cracked them on the large end and removed enough shell to allow the egg to be tipped out into a small bowl.

Tipped out into a small bowl.
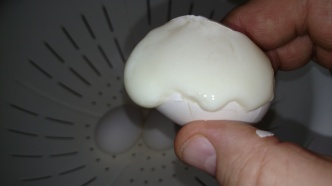
Carefully opening the egg.
After I checked the yolk texture, I gently lifted the eggs onto some awaiting toast, leaving that little bit of watery white behind.

Sous vise eggs on toast. Yum.

Yolk test…oh, MY!
I will say that, while the whites were very soft, there were not what I would call “slimy”…that really repulsive stuff on eggs when someone under-cooks the whites. I would just like them set firmer. Overall, I’m very impressed. I have seen sous vide recipes for creme brulee and hollandaise sauce. I haven’t gone through them yet, but I’m betting the texture is remarkable. We’ll see!


